Automate Graphic Design using Python
Use Python Pillow to automate the creation of hundred warehouse labels for the signage of picking locations
You are an implementation manager in the logistics department of an international fashion retailer.
For each project, you manage equipment implementation, train teams, and design storage layouts.

Therefore, you spend a tremendous time in graphic design for posters, security signage or labels.
In this article, we explore a method to automate graphic design using the Python library Pillow.
💌 New articles straight to your inbox for free: Newsletter
If you prefer watching, have a look at the Youtube tutorial,
Problem Statement
Scenario
You are part of the project team of the logistics department of a fashion retailer that has warehouses on all continents.
This team is in charge of implementing processes and equipment for newly opened distribution centres.
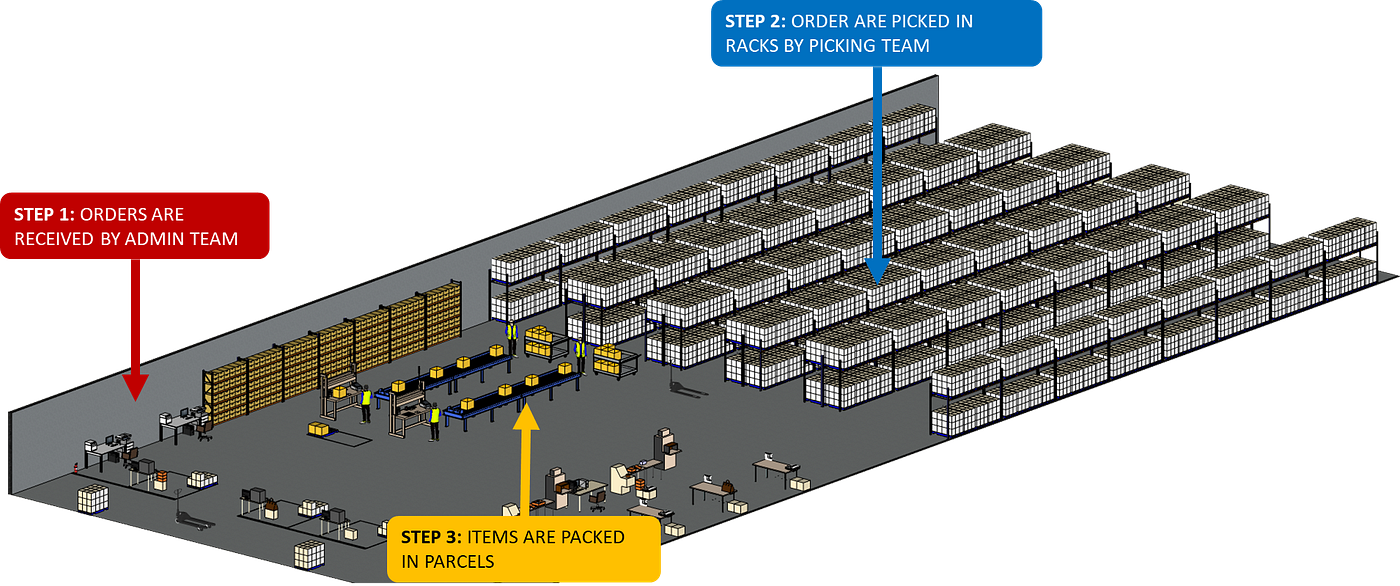
For instance, your major task is to design the layout of racks for storage locations.
In a warehouse, you can have several hundred locations with pallets/shelves for storage and picking.
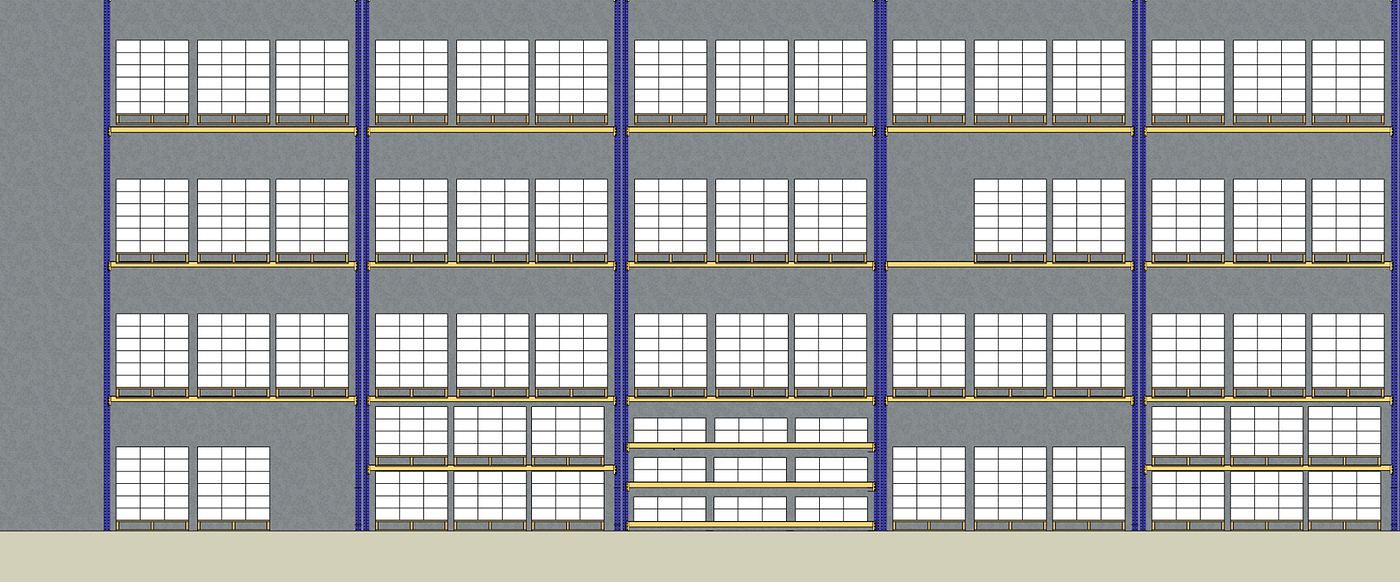
In order to help the operators to find the right locations, you need to print and stick labels with key information.
Objective
You want to design customized labels to reduce errors, help operators and respect the standard operating procedures of your company.
Because you may have several thousand locations per warehouse, you would like to automate this process.
Solution
I will present a solution to automatically create these labels.
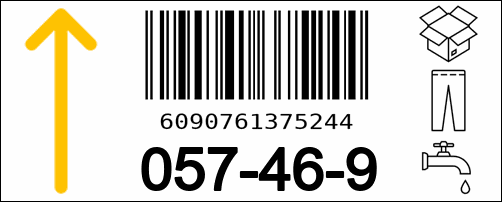
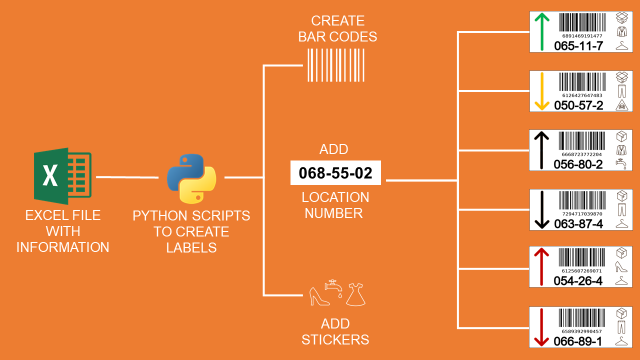
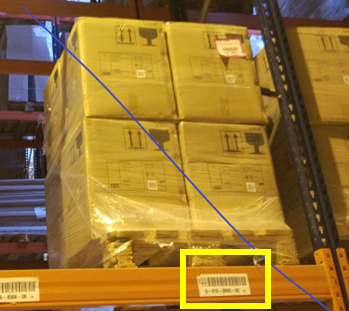
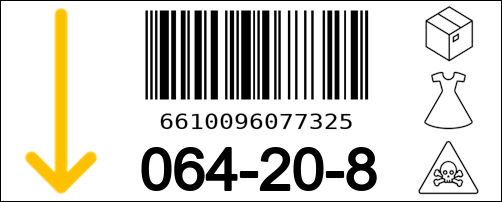
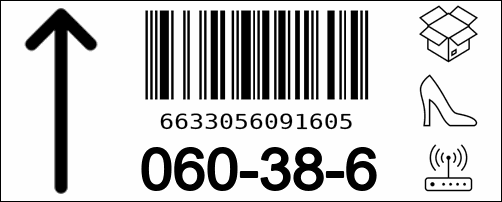
It is a simple python script that imports location information from an excel file and automatically generates labels like the ones above.
Label Design
Six key parameters
This label will be read by three types of operators:
- Reach Truck Drivers who will put pallets or boxes in these locations
- Picking Operators that will take items from these locations
- Inventory admins who will perform inventory counts
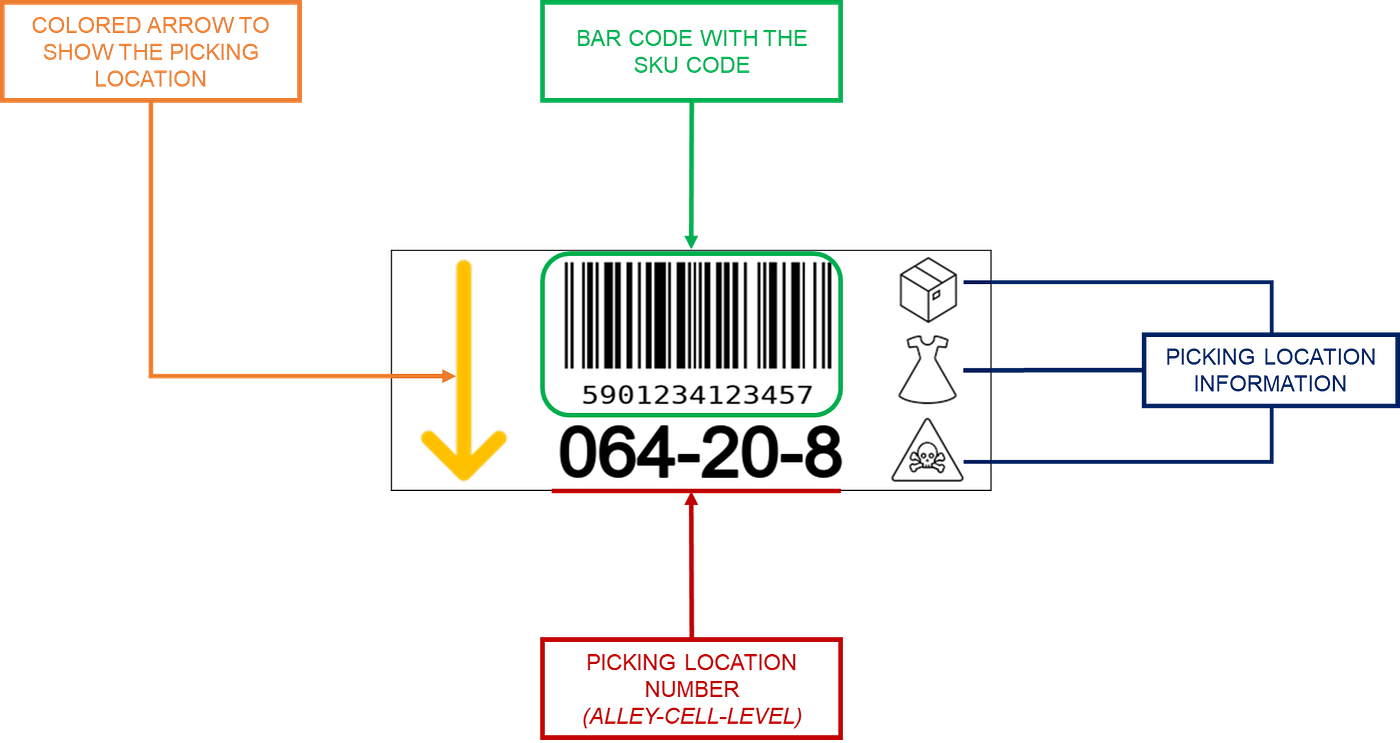
Therefore, you will need to include some key information related to the location and the product stored:
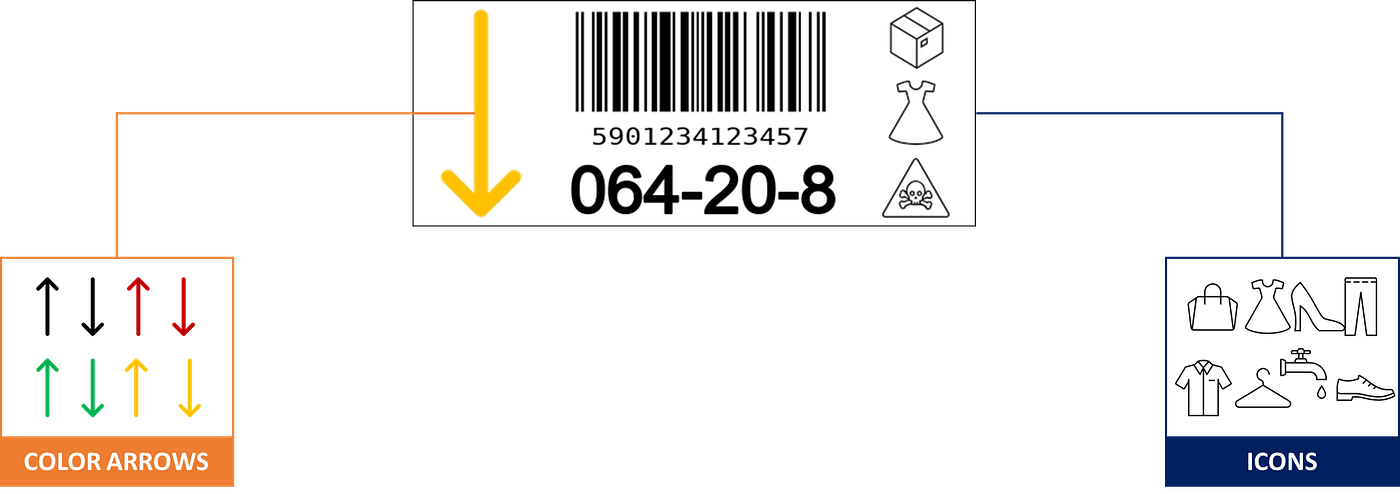
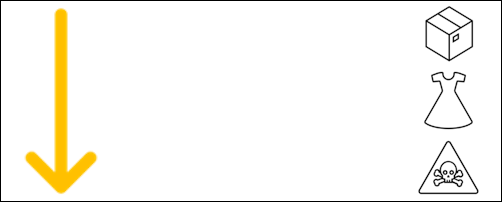
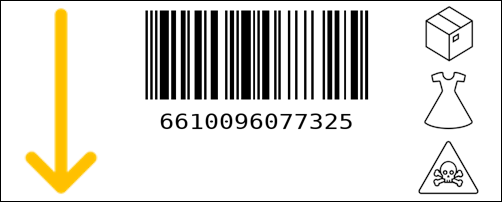
- A coloured arrow to show where the product is stored (above or below)
- A bar code with the SKU code for the operators using an RF gun
- The picking location number with the alley, cell and level numbers
- Three Icons that provide information related to the location and the item stored
Spatial Coordinates
Given the size of each item, you want to fix its spatial coordinate.

In this very simple label, you have five parameters to locate the different items.
We decided to put the origin in the top-left corner.
It’s because Pillow is using the same origin.
Import PNG icons
The storage location number and the bar code will be generated in your Python script.
The other items are icons that will be imported into your Pillow object using locally store png files.
Information source
In your master data, you have several thousand SKUs with information like the size, weight, price, etc.
You will allocate each of these SKUs to a picking location that will require a specific label.
For your automation tool, you can create an Excel file with a line for each SKU including:
- SKU Code: that will be used to create the bar code
- Geographical information: alley, zone and location number
- Logistics handling unit: pieces if you take items piece by piece or Carton if you take the item by carton
- Arrow type with the direction and the colour
- Product Category (Tie, Shoes, Dress, …)
- Picking Location Special Information: dangerous goods, sprinklers, RFID, …
Automate the label creation
Start the loop
Your script will loop over the rows of your data frame to generate a single label for each row.
For each label, you start by creating a blank canvas with a black border and specific dimensions (500, 200) in pixels.

Add the icons
For this step, you will add icons specifying
- Coordinates (x, y)
- Dimensions after resizing using percentages
- The icon filename is taken from the data frame
P.S:
- You need to convert your PNG files to keep a transparent background.
- Icons' coordinates are defined using their size on both axes
Add the bar code
The barcode is generated using the SKU code and the Python barcode library.
P.S:
- create_ean will generate a png file stored locally that will be used in the loop
- The bar code has been resized to fit in the canvas
Add the location code
This last step will be fully performed using Python Pillow.
Et voila!
Your labels are ready for printing.
This is not an artwork of Leonardo Da Vinci, but it can be automatically generated for thousands of labels with just a click.
About Me
Let’s connect on LinkedIn and Twitter. I am a Supply Chain Engineer who is using data analytics to improve logistics operations and reduce costs.
If you’re looking for tailored consulting solutions to optimise your supply chain and meet sustainability goals, please contact me.